Doesn’t spring just make you want to go out and buy a bunch
of flowers to fill your apartment with? I know it sure makes me want to. The
urge has been particularly heightened lately because I’ve been reading a lot of
gardening books (yes, I’m still on my Beverley Nichols kick).
Unfortunately, with a student’s budget (a graduate student’s
budget, no less) I find it really difficult to justify buying bunches and
bunches of flowers (oh the expense!) that will die in a few weeks. And if you
live in an apartment that doesn’t have the space for a garden, there isn’t even
the option of trying to grow your own. This is troublesome to those of us who desperately
crave an English cottage garden. Woe is me! Woe is you!
You know what’s pretty cool though? Paper flowers. The best
part: they last forever (practically), can look quite realistic, are easy to
make yourself, and the supplies are relatively inexpensive. Why not craft your
own bunch?
You will need:
- Floral wire
- Floral tape
- Tissue paper or crepe paper in various colors
- Glue (Elmer’s is fine, but tacky glue is even better!)
- Scissors and pinking shears
- Watercolor paints
- Cardstock or cardboard (optional)
Start by cutting a length of wire—I typically start out with
about 10–11 inches.
Bend one end into a couple loops, almost like you’re trying
to make a little ball.
Take a rectangle of yellow tissue paper (folded over itself
a few times) and wrap it over the “ball,” twisting it around the wire and
securing it with a little glue.
Wrap your wire in floral tape. If you don’t know how or are
having a little trouble, I recommend watching
this tutorial.
Once it’s wrapped nice and tight, you can begin filling out
the center of your flower. Cut a rectangle of tissue paper (around 2 in by 6
in) and fold it in half lengthwise. Cut the non-folded side to make a fringe,
then start wrapping and gluing it around the “ball.”
That’s starting to look better, isn’t it?
 |
| Alternatively, you could stop here and have a dandelion! |
Time for petals.
With some white tissue paper, cut a rectangle and fold it
lengthwise. Carefully cut a scalloped fringe so that your rectangle resembles a
row of petals.
Wrap and glue around the center of your flower. If the
petals go a bit wonky (too full in some places, to sparse in others) don’t be
afraid to glue single petals here or there to even it out. I found I had to
wrap the flower with two rectangles to get a nice full-looking flower.
Trim petals, if necessary, to shape the flower into more of
a flowery, appealing shape.
Touch up with watercolor paints if you want to add a little
more color variation, and finish with a piece of floral tape around the base of the
petals, to secure better to the stem.
*This same flower structure can be done in other tissue
paper colors to construct different flowers. For example, a dark brown or black
center with yellow-orange petals for black-eyed Susans. Or on a bit of a bigger
scale, a much larger center in brown with yellow petals for sunflowers.
 |
|
Cut your length of wire and make the little ball on the end, just like you did with the daisy.
Fill out the center of the flower like you did with the
daisy, but use black/dark brown tissue paper. If you don't have black paper, you can color a rectangle of white tissue paper with a marker.
From red or orange tissue paper, cut out your petals. I
found it helpful to study some pictures of poppies. For a more realistic flower, cut your petals in varying
sizes. You can always make a pattern with some cardstock or cardboard though, if you want flowers that are symmetrical.
If you’re aiming for super realism, use watercolors to give
your petals some more color and shading.
Begin gluing them around the center of the flower, starting
with the smaller petals and then gluing the larger ones around them.
 |
| After one row of petals |
Two layers of petals usually does the trick.
 |
| Archie likes flowers too! |
Trim petals, if necessary, to shape the flower.
Finish with a piece of floral tape around the base of the
petals.
Start with a yellow center. Build it up substantially bigger
than the daisy’s.
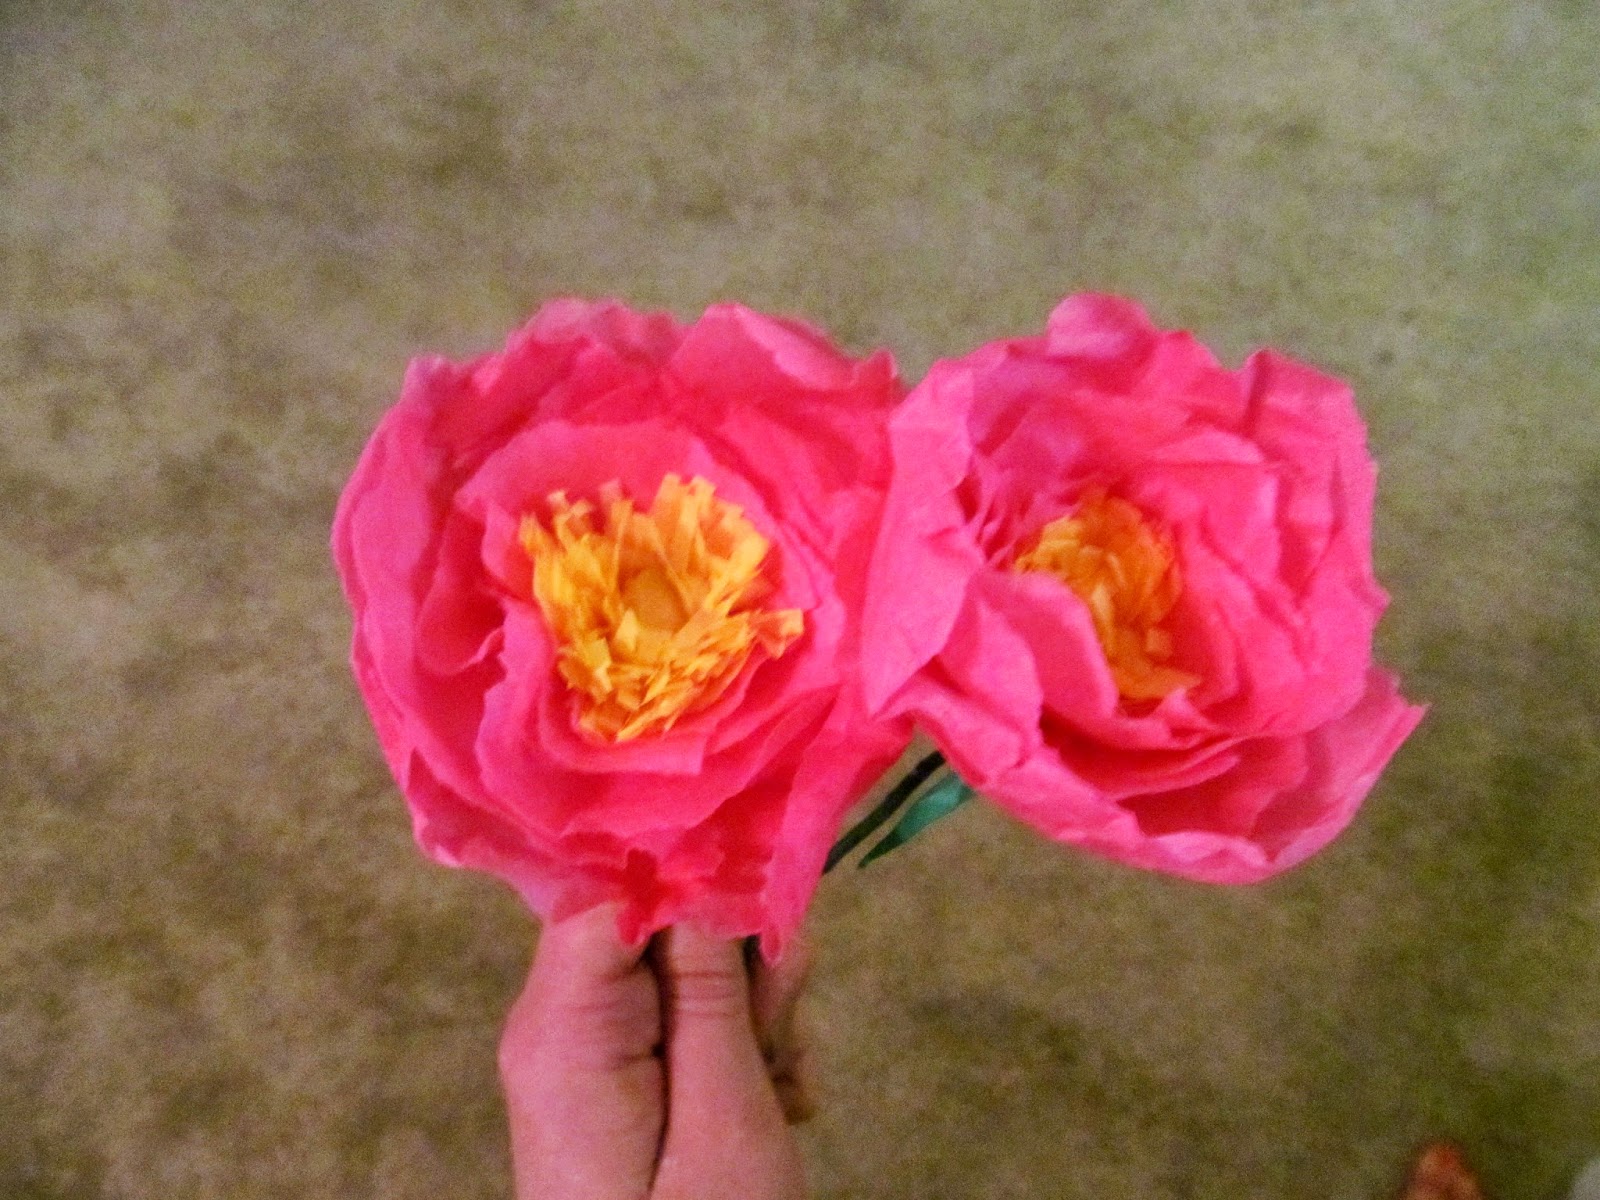
Choose your tissue paper color (bright pinks or pastels look
nice) for the petals and tear rounded pieces from it. The torn edges—as opposed
to cutting—make the petals look more realistic. A simple
Google image search for peonies will give you a good idea of how the petals should look and sit
next to one another.
Begin gluing the petals around the center, starting with the
smaller ones and then gradually moving to larger ones. Gently shape the flower
as you go, curling the petals inward to give it more of a rounded shape.
Once you have your peony nice and full, wet your fingertip with a little water and run it along the top edges of the petals, gently curling them inward. When dried, this gives it a more realistic look. If you wish, use watercolor paints instead of a whetted fingertip to add some more color, while curling the petals inward.
Cut three leaf shapes from some green cardstock and shape
them.
Glue against stem, right beneath the head of the flower.
Secure with a piece of floral tape.
And you’re done!
Start with your floral-taped wire and a white center.
Fold a piece of white tissue paper over on itself many
times, and sketch circles that gradually get larger.
Cut them out with pinking shears, making little slits as you
go to form “petals.”
Poke a hole in the center of each stack and slide on the
wire, cupping the paper upward and ruffling the tissue.
Once you’re happy with the size, cut a circular piece of green
cardstock, cut a slit to the center, and glue it into a cone shape.
Slide the cone shape up the wire, gluing it against the tissue so it supports it in a way that pushes the paper upward.
Use watercolor paints to further color and ruffle your
petals.
Tada!
There are many other flowers that can be created from tissue
or crepe paper, all it takes is a little time and imagination. A bouquet always
makes a nice gift! If you feel stumped, there are many books and online tutorials
to offer tips and ideas.
If you enjoyed this
tutorial and would like to see more like this, leave me a comment
letting me know! And if you decide to craft your own bouquet, I’d love to see
how yours turned out!


yes more craft post!
ReplyDeleteloved this...you're so creative!
-haley